"Step-by-Step Guide: Installing Strapi 5 with PostgreSQL 17 on DynHyp Platform"
Introduction
In today's digital development landscape, managing database servers and content management systems can be a complex challenge. DynHyp simplifies this process by providing an innovative solution that makes database server creation and management effortless. In this guide, we'll explore how to install Strapi 5 using PostgreSQL 17 on the DynHyp platform.
Strapi 5, a leading headless CMS in modern web applications, when combined with PostgreSQL 17's advanced features, creates a powerful and scalable infrastructure. Thanks to DynHyp's user-friendly interface, you can integrate this powerful combination into your projects within minutes.
In this comprehensive guide, we'll walk through the entire process from setting up PostgreSQL 17 on DynHyp to successfully configuring Strapi 5. You'll learn how to perform critical steps such as database creation, connection settings, and Strapi configuration through DynHyp's intuitive interface.
1. PostgreSQL Server Setup (DynHyp)
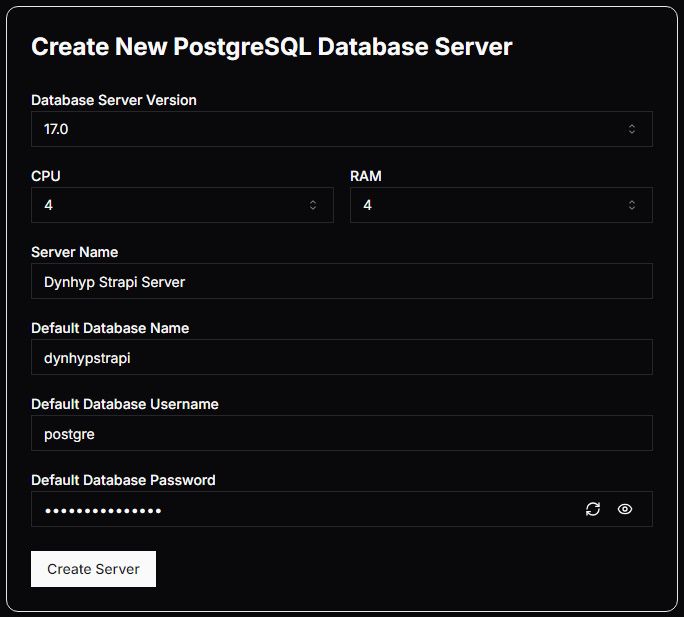
Step 1: Creating the Server
- Log in to DynHyp Dashboard
- Click on "Database Servers" in the left menu
- Click the "Create Server" button above the PostgreSQL option
- Fill in the required information in the server configuration screen:
Step 2: Connection Test and Information
- Click on the three dots (⋮) menu on the right side of the created server
- Select "Connection Info" from the menu
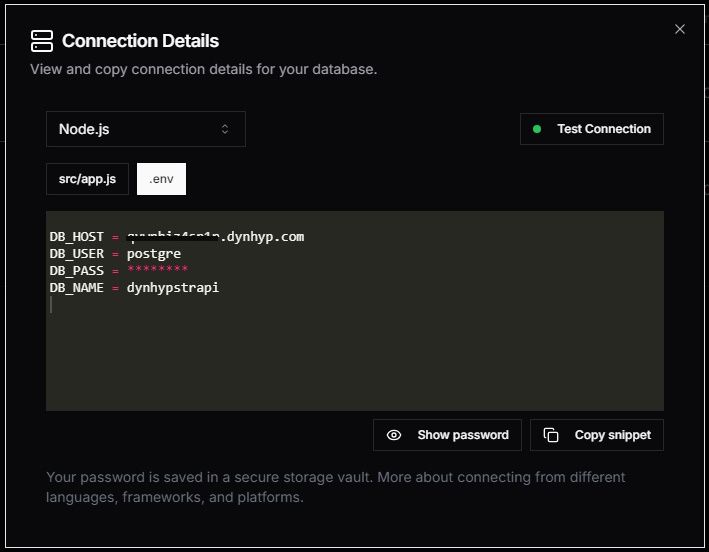
- Click "Test Connection" to test the connection
- A success message will be displayed when the connection is successful
- Important: Copy the connection information using the "Copy Snippet" button and store it in a secure location
2. Strapi Installation
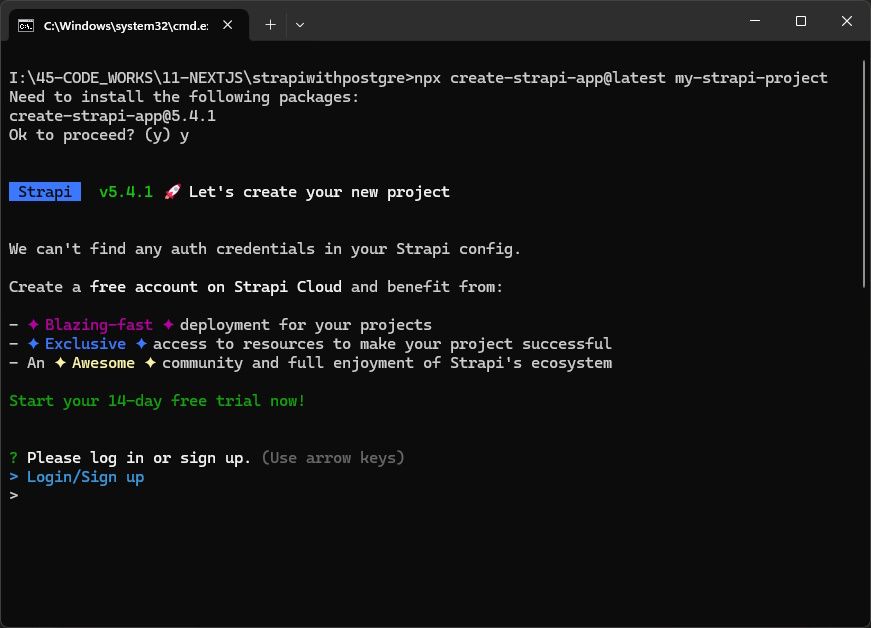
Step 1: Creating a New Project
Open your terminal or command prompt and run the following command:
npx create-strapi-app@latest my-strapi-project
cd my-strapi-project
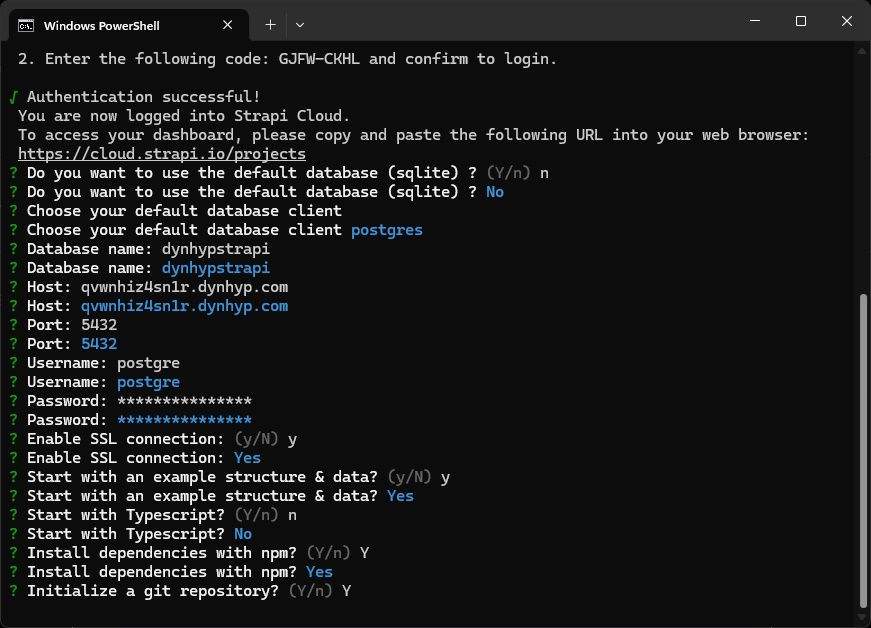
Step 2: Answering Installation Questions
Answer the installation questions as follows:
- "Do you want to use the default database (sqlite)?" →
n - "Choose your default database client" →
postgres - "Database name:" →
dynhypstrapi - "Host:" →
qvwnhiz4snlr.dynhyp.com - "Port:" →
5432 - "Username:" →
postgre - "Password:" → [Password from DynHyp]
- "Enable SSL connection:" →
y - "Start with an example structure & data?" →
y - "Start with Typescript?" →
n - "Install dependencies with npm?" →
y - "Initialize a git repository?" →
y
Step 3: Starting Strapi
After the installation is complete, start Strapi in development mode:
npm run develop
After successful installation, you can access the admin panel at
http://localhost:1337/admin.
Important Notes
- Securely store the connection information obtained from DynHyp
- Ensure that your PostgreSQL server's security settings allow Strapi connections
- After creating your first admin account, store your login credentials securely
Next Steps
After successful installation, you can:
- Start creating your content types from the admin panel
- Test your API endpoints
- Configure user roles and permissions
- Connect your frontend application to the Strapi API


![PostgreSQL Create User: A Complete Guide [2024]](/_next/image?url=https%3A%2F%2Fstrapi.dynhyp.com%2Fuploads%2Fthumbnail_postgresql_create_user_complete_guide_da94453f66.png&w=256&q=75)